Excel 2013 offers a formatting option that makes this possible, and you won’t even need to create and link multiple sections of a document. Our guide below will show you how to specify a header that is different on the first page.
Using a Different Header on the First Page in Excel 2013
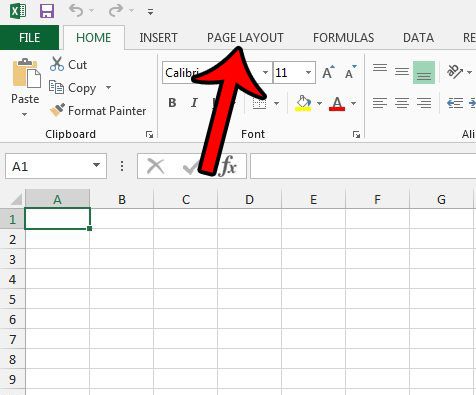
The steps in the tutorial below are going to show you how to use two different headers for your Excel 2013 worksheet. You will be able to customize the header that only appears on the first page, then you will be able to use a different header for the rest of the pages. Step 1: Open your file in Excel 2013. Step 2: Click the Page Layout tab at the top of the window.
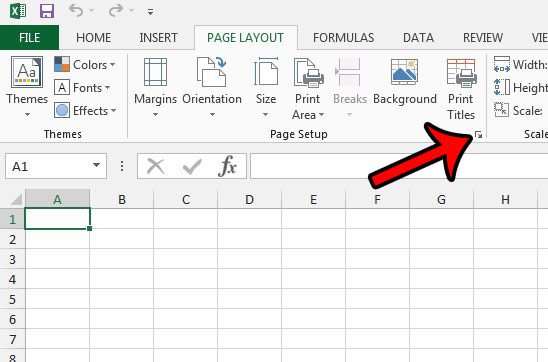
Step 3: Click the tiny Page Setup dialog launcher at the bottom-right corner of the Page Setup section of the ribbon.
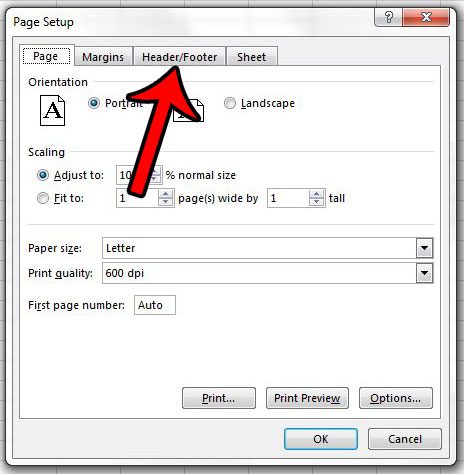
Step 4: Click the Header/Footer tab at the top of the Page Setup window.
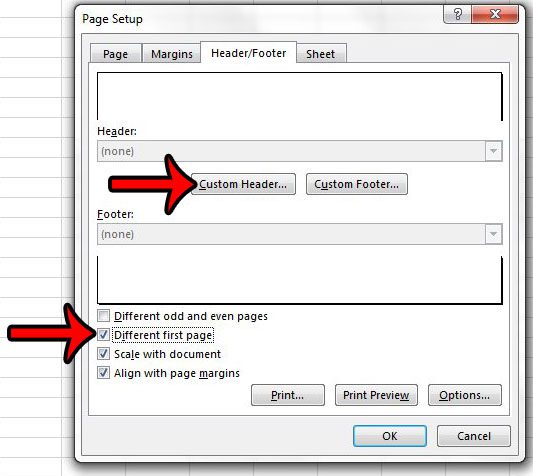
Step 5: Check the box to the left of Different first page, then click the Custom Header button.
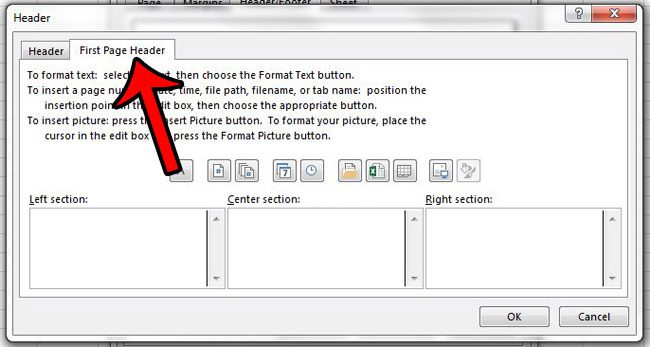
Step 6: Click the First Page Header tab at the top of this window.
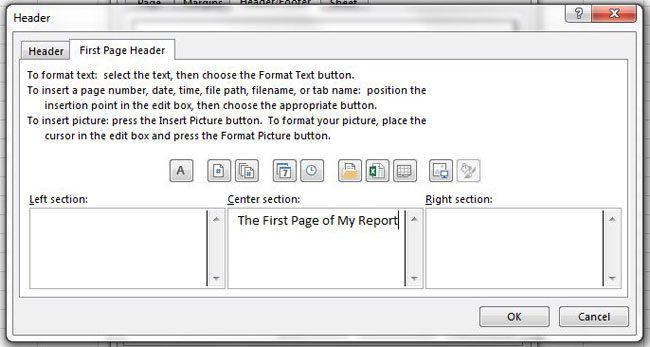
Step 7: Enter the contents of your first page header. You can then click the Header tab at the top of this window and enter the information that you want to appear at the top of the rest of the pages. Click the OK button at the bottom of the window when you are done.
Another helpful setting to use in Excel 2013 when you are concerned about printing a spreadsheet is to repeat the top header row on every page. Click here and learn how to make it much simpler for your readers to identify cells when reading your data on pieces of paper. After receiving his Bachelor’s and Master’s degrees in Computer Science he spent several years working in IT management for small businesses. However, he now works full time writing content online and creating websites. His main writing topics include iPhones, Microsoft Office, Google Apps, Android, and Photoshop, but he has also written about many other tech topics as well. Read his full bio here.
You may opt out at any time. Read our Privacy Policy
