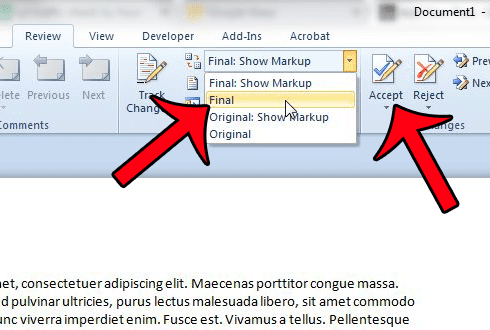
The steps in our guide below will show you where to go to enable the option to track changes in your document. You can follow these steps and return to this same location to turn this option off when you are done using it.
How to Enable the Track Changes Option in Word 2010
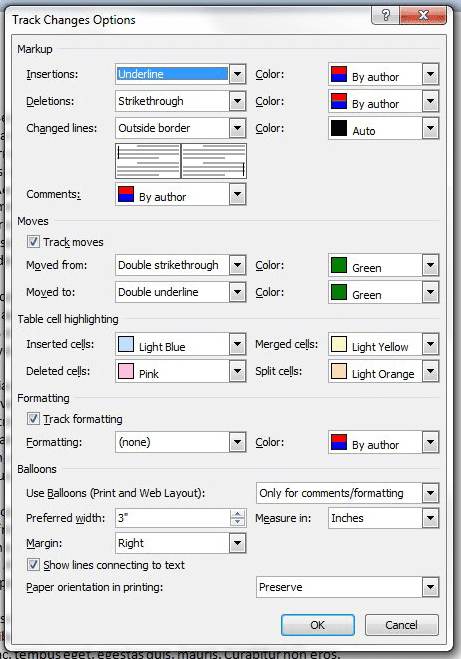
The steps below were performed in Microsoft Word 2010. Note that the option to track changes is tied to the individual document, and will remain on or off based on the last setting for that document. If you are collaborating on a document that will be submitted to a teacher or a colleague, then it is probably a good idea to accept all of the changes in the document, or mark the document as Final in the Tracking section on the Review tab. Step 1: Open your document in Word 2010. Step 2: Click the Review tab at the top of the window. Step 3: Click the Track Changes button in the Tracking section of the Office ribbon. If you wish to change the tracking options at any time, click the arrow to the right of Track Changes, then click the Change Tracking Options button. This will give you the menu below, where you can further customize how the changes are tracked in the document. You can click the OK button when you are done adjusting the options on this window. Are there strange spaces and page breaks in your document, but you do not know how to fix them? This article will allow you to show all of the formatting marks in a document, which makes some formatting issues easier to resolve. After receiving his Bachelor’s and Master’s degrees in Computer Science he spent several years working in IT management for small businesses. However, he now works full time writing content online and creating websites. His main writing topics include iPhones, Microsoft Office, Google Apps, Android, and Photoshop, but he has also written about many other tech topics as well. Read his full bio here.
You may opt out at any time. Read our Privacy Policy


