A lot of gaming consoles can do it, your laptop or desktop computer can do it, and so can your iPhone and iPad. Our tutorial below will show you how ot quickly capture a picture of your iPad screen and save that image to your camera roll so that you can include in it documents, edit it, or send it to a friend.
How to Do a Screenshot on iPad 2
Our guide continues below with additional information on taking pictures of an iPad screen, including pictures of these steps. Troubleshooting an iPad can take a lot of different shapes. You may have found some tutorials that tried to guide you in the right direction but, if those didn’t work, then you might be working with someone and you need to know how to take picture of screen on iPad. You’ve probably seen images of iPad or iPhone screens that have almost perfect resolution and no glare. These pictures were not taken with a second camera, but rather directly from the device. This is called a screenshot, and is a built-in feature on every iPad. It’s also a part of many other devices that have screens. For example, you can find out how to take a screenshot on Acer laptop models if you have one of that brand of laptop computers. Learn how to take a screenshot on your iPad using the steps below. Have you been trying to figure out how to interact with QR codes using your iPad? Our how to use iPad to scan QR code tutorial will show you how.
How to Take a Screenshot on the iPad 2 (Guide with Pictures)
We use screenshots a lot at solveyourtech.com because they are the best way to show a device’s screen. Plus your iPad stores these screenshots in the Camera Roll, making it a simple process to get the screenshots to a cloud storage service like Dropbox. You can read this article to learn how to set that up. But you can follow the steps below to learn about iPad 2 screenshots.
Step 1: Arrange your screen so that it is showing the configuration of which you want to take a picture.
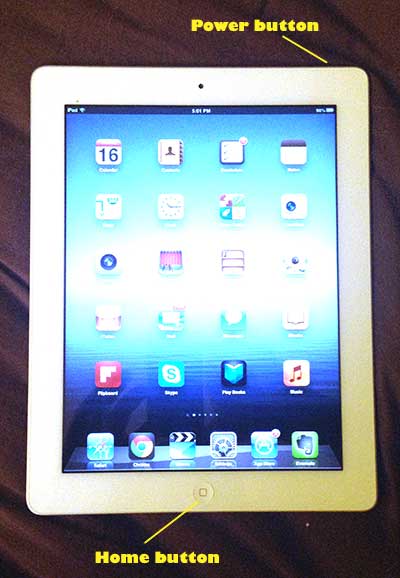
I am just going to capture my home screen, as in the image below.
Step 2: Hold down the Home button, then quickly press the Power button on the top of the device.
This needs to be done relatively quickly, so it’s best to position your hands accordingly. I find it simplest to press the Home button with my left thumb and press the Power button with my right index finger. You will know when the screenshot has been taken because the screen will flash and you will hear a shutter sound. Now that you know how ot take a screen shot on your iPad you will be able to use this skill whenever you have something on your screen that you would like to capture and share with others. You can read this article if you want to learn how to turn off the camera sound on your iPad.
Additional Sources
After receiving his Bachelor’s and Master’s degrees in Computer Science he spent several years working in IT management for small businesses. However, he now works full time writing content online and creating websites. His main writing topics include iPhones, Microsoft Office, Google Apps, Android, and Photoshop, but he has also written about many other tech topics as well. Read his full bio here.
You may opt out at any time. Read our Privacy Policy