Microsoft Word is full of different tools and menus that let you customize your document, and line spacing is something that you can adjust. Our tutorial below will show you how to single space in Word, even if you have already written and edited the entire document.
How to Make a Word Single Space Document
Our guide continues below with additional information on how to make a document single space instead of double space in Microsoft Word, including pictures of these steps. Document spacing can impact several things, including the number of pages in the document. Microsoft Word includes several different options from which you can select to control the amount of space between the lines in your document. Many schools and organizations have their own rules and preferences when it comes to the amount of line spacing that you have in your documents. Often they want you to use double spacing, but it’s entirely possible that they might want single spacing to reduce the number of pages in documents. A document in Microsoft Word can have a lot of different formatting options, including the amount of space between lines. If your current document is double spaced, or if it appears to have more or less spacing than the single spacing you need, you may be looking for a way to adjust that. You can make a Microsoft Word single space document by opening the document, selecting all of the text, choosing the Home tab, clicking the Line and Paragraph Spacing button, then choosing the 1.0 option from the drop down menu. Our guide below will show you how to single space in Word by selecting all of the text in the document and adjusting the line spacing setting. You can also check out our tutorial on how to select all in Word if you would like to know more about using that option.
How to Use Single Spacing in Word for Office 365 (Guide with Pictures)
The steps in this article were performed in the Microsoft Word for Office 365 version of the application but will work in most other versions as well.
Step 1: Open your document in Microsoft Word.
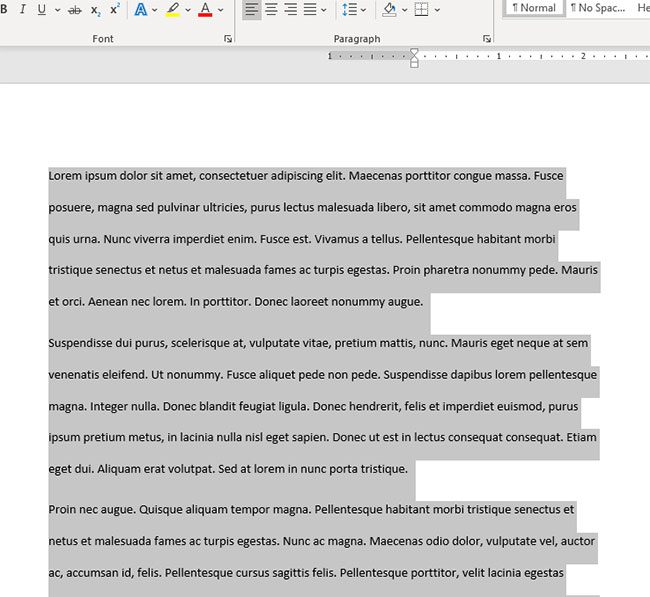
Step 2: Click inside the document, then press Ctrl + A on your keyboard to select everything.
If this is a new, blank document, you can skip this step.
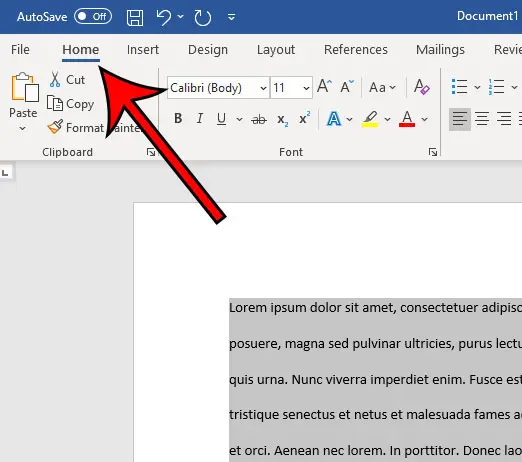
Step 3: Select the Home tab at the top of the window.
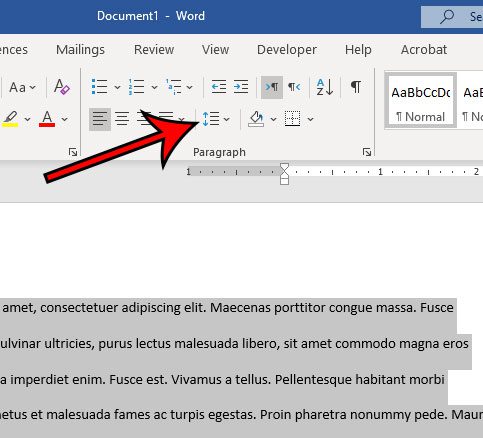
Step 4: Click the Line & Paragraph Spacing button in the Paragraph section of the ribbon.
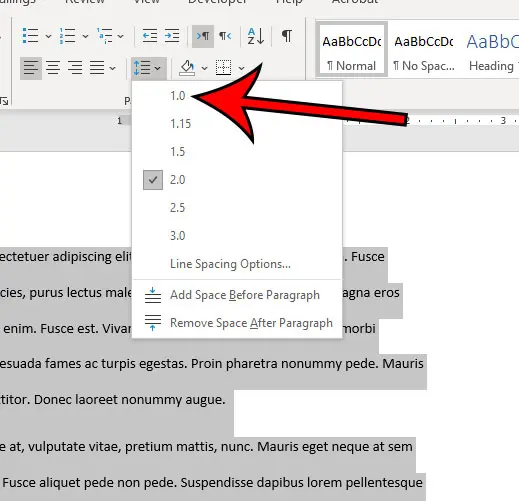
Step 5: Choose the 1.0 option from the dropdown menu to switch the document to single spacing.
Note that there is a Line Spacing Options button at the bottom of that dropdown menu. If you select that option, you will be able to customize your document spacing further and set a new default spacing option if you would like. Our tutorial continues below with additional discussion about how to make a document single spaced in Word. You can also read our article on how to double space in Word for additional information about Microsoft Word line spacing.
How to Change Default Line Spacing in Microsoft Word
While you can change line spacing in every document that you create or edit in Microsoft Word, you might not want to adjust spacing every time. But if your Word Normal template is defaulting to double spacing and you need to have single spacing more often, then constantly switching the line spaces can not only be tedious, it can be something that you forget to do. Fortunately, among all of the different formatting adjustments that you can make for your document, there is a way to set the default line spacing. Now any new documents that you create in Microsoft Word that use the Normal template will have the line spacing that you just chose. this will not affect the line spacing in any of your existing documents.
More Information on How to Apply Single Line Spacing in Word
While we have focused on changing the line spacing setting in an MS Word document, for the entire document, you can also format a document so that only some of it is single spaced. Rather than selecting the whole document, simply use your mouse to select the part of the document for which you want to change the spacing, then follow the steps above to apply a new line spacing setting to that selection. Another thing that you can adjust that relates to line spacing is the paragraph space setting. This affects the amount of line spacing that appears before and after your paragraphs. You can find the paragraph spacing settings by clicking the Home tab, then clicking the small Paragraph Settings button at the bottom-right corner of the Paragraph group in the ribbon. This will open the Paragraph dialog box. There you can select line spacing options in the “Spacing” section so that you can choose the amount of space before and after a paragraph, as well as determine the line spacing type. if you select the Home tab, then click the Paragraph Spacing button at the bottom-right of the Paragraph group, it will open a Paragraph dialog box. At the top of the Paragraph dialog box, you will see Indents and Spacing, as well as Line and Page Breaks tabs. Here you can customize the spacing before and after your paragraphs, as well as select line spacing options. Simply click the Set as Default button at the bottom of the Paragraph menu, then confirm that you want to make this change. Simply follow the steps above, but rather than selecting the entire document, select only the part of the document that you want to single space. Then when you click the Line and Paragraph Spacing button in the Paragraph group and choose the 1.0 option, it will only affect the part of the document that’s currently highlighted. After receiving his Bachelor’s and Master’s degrees in Computer Science he spent several years working in IT management for small businesses. However, he now works full time writing content online and creating websites. His main writing topics include iPhones, Microsoft Office, Google Apps, Android, and Photoshop, but he has also written about many other tech topics as well. Read his full bio here.


