Like most word processing applications that you will encounter, it’s very possible to make spelling mistakes in Google Docs. Whether it was because a word was actually misspelled, or because you made a typo, it’s very common for a document of any length to have at least one spelling error. But your school or job may react negatively to an error such as that in your document, so it’s helpful to proofread the document and ensure that no spelling errors are present. But this is a difficult thing to manually, so you may be looking for a way to check your document spelling. Our guide below will show you how to use the spell checker in Google Docs. Need to switch away from portrait orientation? Find out how to make Google Docs landscape by changing a setting on the Page Setup menu.
How to Check Document Spelling in Google Docs
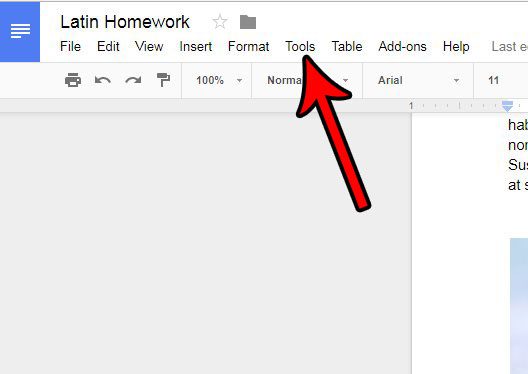
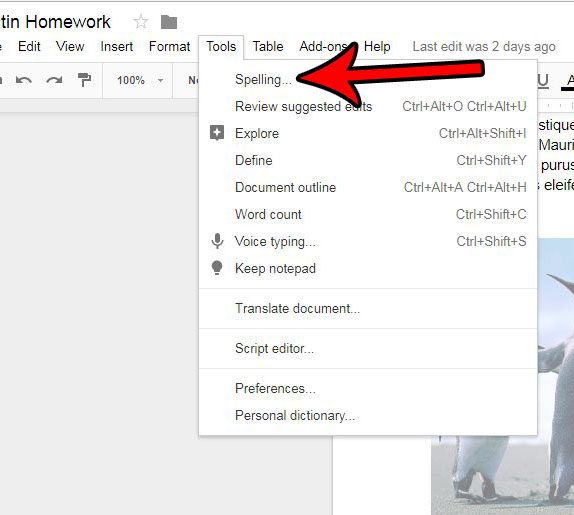
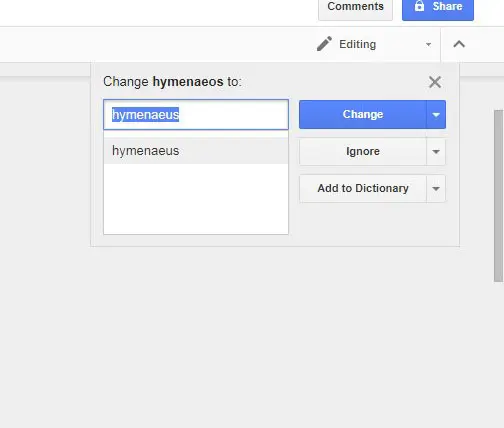
The steps in this article were performed in Google Chrome, but should also work in other desktop Web browsers as well. Step 1: Go to your Google Drive at https://drive.google.com/drive/my-drive and open the document for which you want to check the spelling. Step 2: Click the Tools tab at the top of the window. Step 3: Click the Spelling option at the top of the menu. Step 4: Elect to Change, Ignore, or Add to Dictionary, then repeat until Google Docs has finished checking the spelling for the entire document. Does your document contain a lot of separate excerpts that all have different formatting? Learn how to clear formatting from a selection in Google Docs and restore your entire document formatting to the default settings. After receiving his Bachelor’s and Master’s degrees in Computer Science he spent several years working in IT management for small businesses. However, he now works full time writing content online and creating websites. His main writing topics include iPhones, Microsoft Office, Google Apps, Android, and Photoshop, but he has also written about many other tech topics as well. Read his full bio here.
You may opt out at any time. Read our Privacy Policy


