Our tutorial below will show you how to take a picture that isn’t transparent, such as one in the .jpg file format, then edit that picture to make it transparent. You will have the ability to either make the entire image somewhat transparent, or you can delete part of the image so that the background only shows through at that spot on the image. You can check out our guide on how to make a transparent background in Photoshop for additional information on this topic.
How to Use Photoshop to Make a Picture Transparent
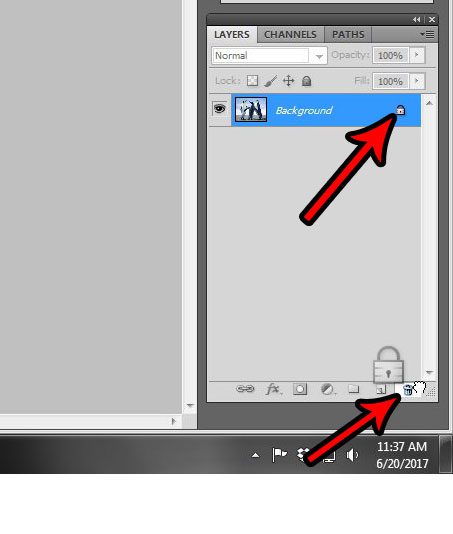
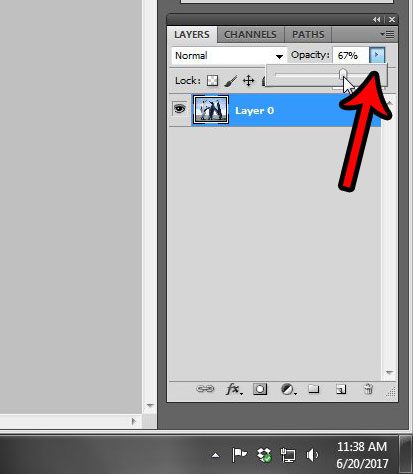
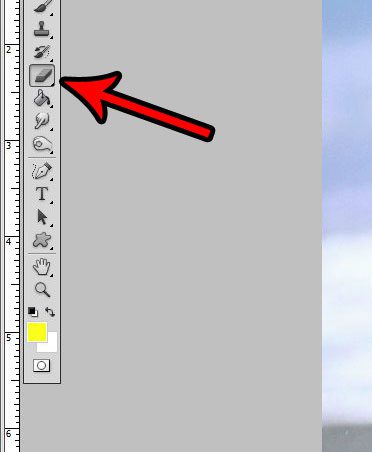
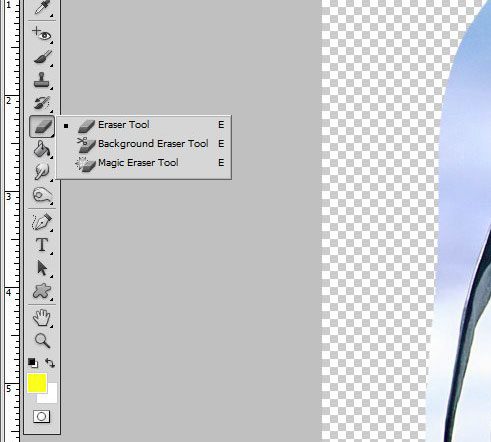
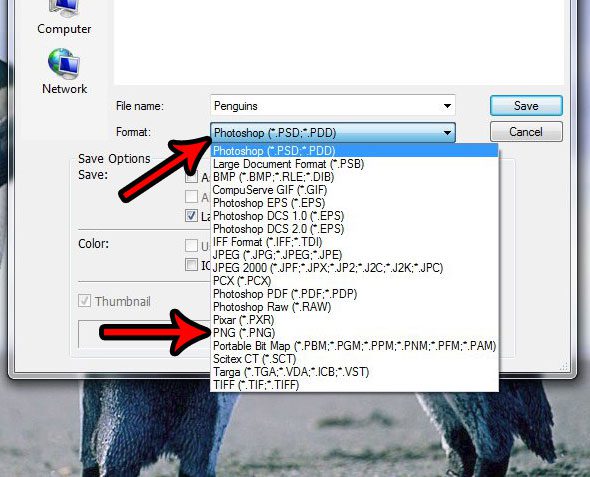
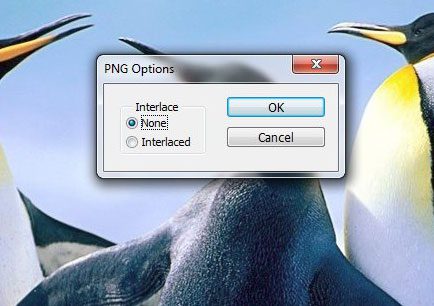
The steps in this article were performed in Adobe Photoshop CS5. The result of completing these steps will be a .png file with a degree of transparency. This means that you will be able to use the image in an application where you will be able to see through the image to view what is behind it. Note that you can also adjust the transparency of images in Microsoft Office programs, such as Powerpoint. Step 1: Open the picture in Photoshop. Step 2: Locate the Layers panel, click the lock icon to the right of the layer there, then drag that lock icon to the trash can icon at the bottom of the Layers panel. If you don’t see the Layers panel, press the F7 key on your keyboard. Step 3: Click the Opacity dropdown menu at the top of the Layers panel, then move the slider to the left until you reach the desired level of transparency. Step 4: If you only want to delete some of the image to make it transparent then you can leave the layer opacity at 100%, but use the eraser too to remove the parts of the background that you don’t want. So click the Eraser tool from the toolbox at the left side of the window. Step 5: Use the eraser tool to delete unwanted parts of the image. Note that you can also right-click the eraser tool to select a Background Eraser Tool or Magic Eraser Tool that might prove more effective for your needs. This Adobe support article can provide additional information on the ways to erase parts of images in the program. Step 6: Once you have finished making your picture transparent, click the File tab at the top of the window, then click the Save As option. Step 7: Click the Format dropdown menu, then click the PNG option. Choose a location for your transparent image, then click the Save button. if you don’t see a PNG option, then your image may be in the CMYK format. This article will show you how to change the “Mode” of your image to RGB so that you can save as a .png file. Step 8: Click the OK button on the PNG Options window to finish saving the file. Does your Photoshop file have a lot of layers and it is becoming difficult to manage them? Learn how to change layer names in Photoshop and make editing a little easier. After receiving his Bachelor’s and Master’s degrees in Computer Science he spent several years working in IT management for small businesses. However, he now works full time writing content online and creating websites. His main writing topics include iPhones, Microsoft Office, Google Apps, Android, and Photoshop, but he has also written about many other tech topics as well. Read his full bio here.
You may opt out at any time. Read our Privacy Policy