Google Docs makes it easy to create a table by going to the Insert > Table menu. But a table that you create will take up the entire page, which you may not want. Fortunately, Google Docs has a surprising amount of ways to customize a table in your document, including options to distribute rows or distribute columns, as well as methods to resize a table. Our guide below will show you how to select the table, modify a setting, and ultimately make a table smaller in Google Docs.
How to Make Tables Smaller in Google Docs
Our article continues below with additional information on how to make your tables smaller in Google Docs, including pictures of these steps. Find out how to make all columns the same width in Google Sheets if you want to easily distribute the column widths in your spreadsheet.
How to Make a Google Docs Table Smaller (Guide with Pictures)
The steps in this article were performed in the desktop version of the Google Chrome Web browser, but will also work in other desktop browsers like Firefox or Edge.
Step 1: Sign into your Google Drive and open your Google Docs file.
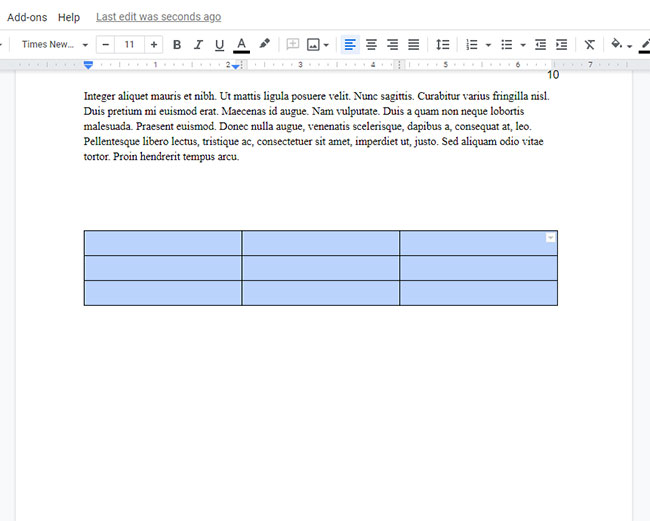
Step 2: Click on the bottom-right cell and drag to the top-left cell to select the entire table.
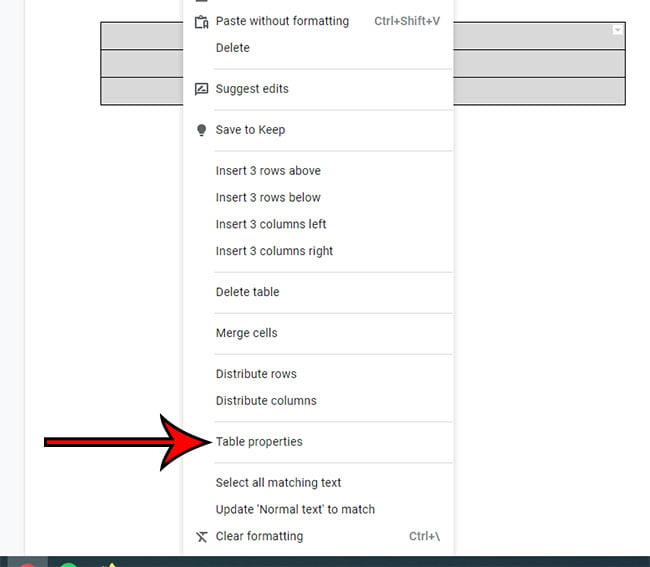
Step 3: Right-click inside any table cell and choose the Table properties option.
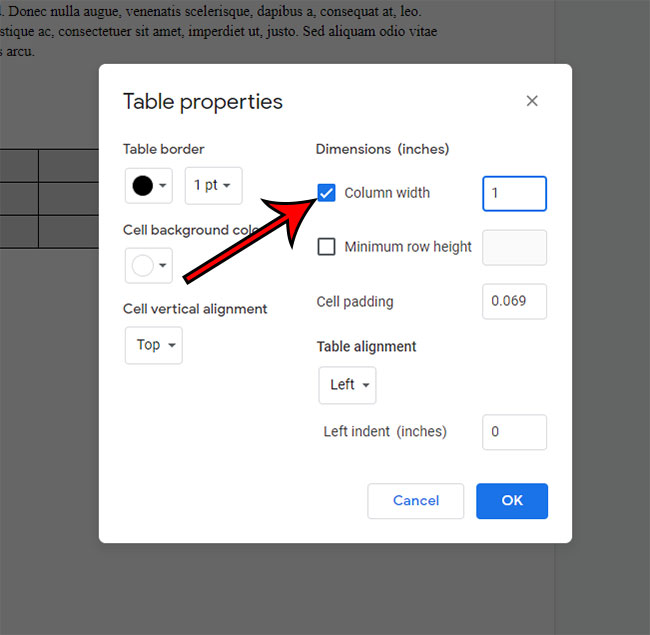
Step 4: Check the box to the left of Column width, then enter the desired width for each column.
Step 5: Adjust any of the other settings on this menu (for example, you may want to change the table alignment to “Center”), then click the OK button.
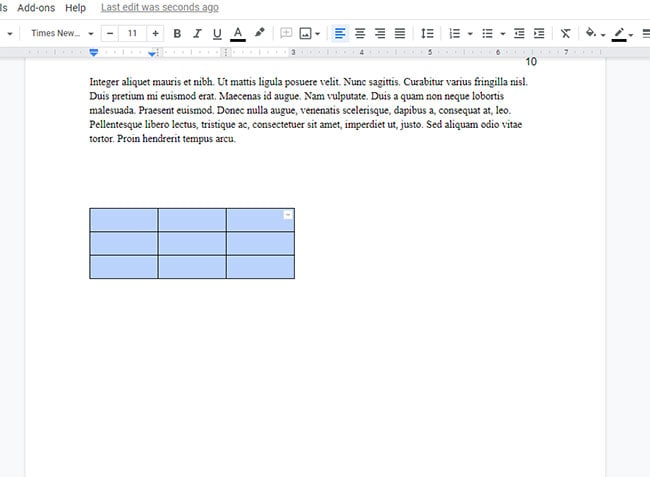
You should now have a smaller table that doesn’t take up the entire width of the document, as in the picture below. Now that you know how to adjust the size of your tables in Google Docs you will be able to fix many of the layout issues that your tables might cause for your documents. Our article on how to add another page on Google Docs will show you a simple way to insert a page in the middle of a document.
More Information on Adjusting Rows and Columns in Google Docs Tables
The Table properties menu that you access in the steps above provides you with a number of ways to modify your row or column dimensions, or the appearance of your table. But before you click the Table properties option on the right click menu you will see options to distribute rows or columns, or add and delete a row or column. If your document has an existing table then you will need to select each row or column that you wish to resize. You cannot change column width or row height for an existing table without first selecting the elements you want to adjust.
If you need to add more columns or rows to your table then you can use the “Insert column” and “Insert row” functions. You can find these by right-clicking on the range in the table next to which you wish to add the row or column, then choosing the Insert Row or Insert Column option from that menu. Note that you are going to have options to:
Insert column left Insert column right Insert row above Insert tow below
Similar adjustments can be made when you want to reduce the number of rows or columns in your table. You can right-click inside of a cell in the row or column you want to remove, then choose the Delete column or Delete row option, based on which type of cell range you are trying to remove. Note that there is also a “Delete table” option if you want to remove the entire table from your document. One other way that you can adjust the size of a table is with your mouse. Position your mouse cursor on the border that you want to adjust then when you see an arrow, click and drag the border to the left or right until you have the desired column width or row height. Similar actions can be taken when using Google Slides tables as well. if you want to add a table to one of the slides in your presentation you can do so from the Insert menu at the top of the window. To add or remove columns and rows from that table, click inside of a cell within the appropriate row or column, then choose the table modification options we discussed above.
He specializes in writing content about iPhones, Android devices, Microsoft Office, and many other popular applications and devices. Read his full bio here.


