Many of the pictures that you have already taken yourself, or which you have access to either for older purposes or that you have found online, aren’t exactly what you need for your Powerpoint slideshow. They might need some minor edits like cropping or a touch-up, which you may need to perform in a picture editing application like Microsoft Paint or Adobe Photoshop. But the picture might actually be backward or upside down, which isn’t necessarily something that requires a third-party application, as Microsoft Powerpoint has its own picture tools that you can use for some editing purposes. Our tutorial below will show you how to use these picture-editing tools if you find that your image is currently displayed differently than you would like it. You can experiment with these picture rotation options to achieve the desired look for your image in Powerpoint.
How to Flip an Image in Powerpoint 2013
Our guide continues below with additional information on flipping a picture in Powerpoint, including pictures of these steps.
How to Flip a Picture Horizontally in Powerpoint (Guide with Pictures)
The steps in this article were performed in Microsoft Powerpoint 2013. This guide assumes that you have already inserted the picture into one of your slides and that you want to flip the picture.
Step 1: Open your presentation in Powerpoint 2013.
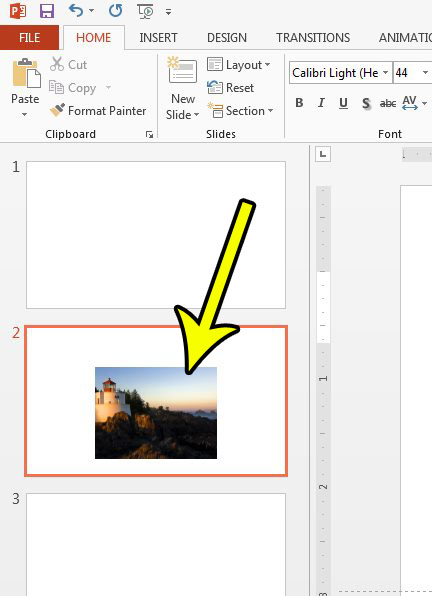
Step 2: Select the slide at the side of the window that contains the picture you want to flip.
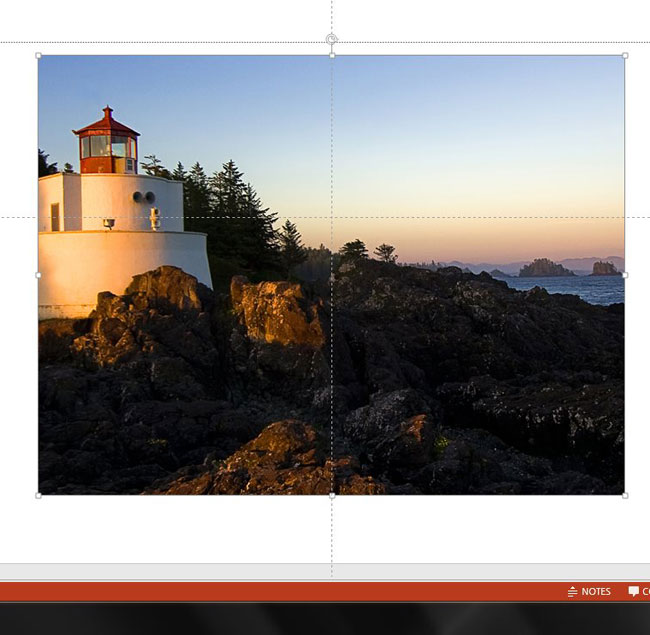
Step 3: Click on the picture in the slideshow to select it.
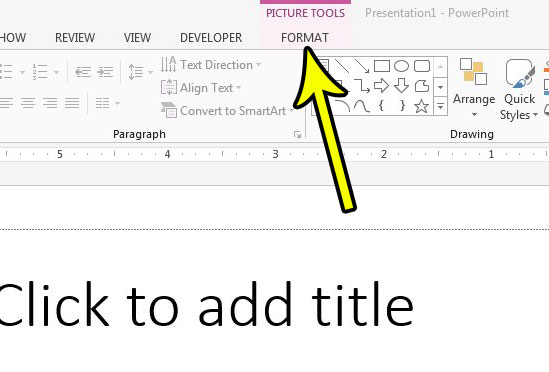
Step 4: Click the Format tab under Picture Tools at the top of the Powerpoint window.
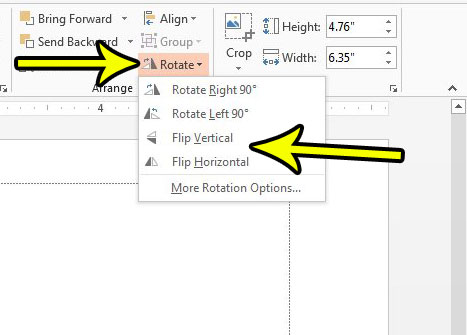
Step 5: Click the Rotate button in the Arrange section of the ribbon, then choose the Flip Horizontal or Flip Vertical option, based on which one you wish to use.
Note that you can also choose to rotate the image, or click the Rotation Options button for some additional ways to manipulate the picture.
How to Mirror Image in Powerpoint 2013
One of the most common reasons that someone will need to flip or rotate an image in their Powerpoint presentation is that the current image is a “mirror” of what they want it to be. At first, an image with this issue could be a little confusing to work with because the standard picture rotation options that appear when you select the image don’t provide you with a way to accomplish this mirror image effect. Fortunately, the steps that we outlined in the previous section will help you to mirror your Powerpoint image. Simply select the picture, then click the Rotate button and choose Flip Horizontal. This flips the picture over a vertical axis so that the left side of the picture appears on the right, and vice versa. We call this mirroring an image because it provides the same result as if you looked at the picture in a mirror. On another note, you can also mirror an image in a Powerpoint presentation or a Word document if you need to print the picture to print it with a t-shirt transfer, as that will usually require you to have a mirrored version of the image to make it print correctly. If you have Microsoft Office and can access those other Microsoft Corporation applications then you may find it a little easier to mirror pictures or shapes in Microsoft Word rather than in Microsoft Powerpoint.
What Happens When I Choose Flip Vertical or Flip Horizontal in Powerpoint?
While selecting from the more advanced rotation options or choosing a custom rotation angle in Powerpoint may require a bit more work, Powerpoint lets you create a completely different perspective for your inserted image when you elect to flip that picture. When you choose the Flip Vertical option your picture will be flipped over a horizontal axis. This means that the top of the picture will be at the bottom, and the bottom of the picture will be at the top. When you choose the Flip Horizontal option your picture will be flipped over a vertical axis, meaning that the left side of the picture will be on the right, and the right side of the picture will be on the left. These effects can only be applied from the Rotate menu. If you drag the rotation handle your images or object will only be rotated. There won’t be any flipping.
More Information on How to Flip a Picture in Powerpoint 2013
The options that you can choose from when you click the Rotate drop down menu in the Arrange group include:
Rotate Right 90 degreesRotate Left 90 degreesFlip VerticalFlip HorizontalMore Rotation Options
If you select the “More Rotation Options” item in this list it will open a new Format Picture menu where you can adjust the size of the picture, choose a rotation amount by degree, or adjust the scale height or scale width. You can also choose to lock the aspect ratio so that the picture doesn’t become distorted as you resize it. If you’ve been experimenting with the direction, shape, or other options for your image then you may have made too many changes that affect the appearance of the picture. If so, then you can click the Reset button on the Format Picture window to restore the image to its original position and layout. If you right click on an image in Powertpoint it will open a shortcut menu. Here you can select from various options that let you edit highlighted objects, including ways to format the picture, change its size and position, or adjust its layer in respect to other objects on the slide. Do you want to add a video to one of your slides, either from a video on your computer or from a Youtube video? Find out how to embed a video in Powerpoint 2013 so that you can play that video when you give your presentation.
Additional Reading
He specializes in writing content about iPhones, Android devices, Microsoft Office, and many other popular applications and devices. Read his full bio here.


