Our tutorial below will show you two different ways that you can elongate cells in Excel. We will be focusing primarily on elongating these cells horizontally, but you can also use similar methods if you wish to elongate them vertically as well.
How to Make a Cell Longer in Excel 2013
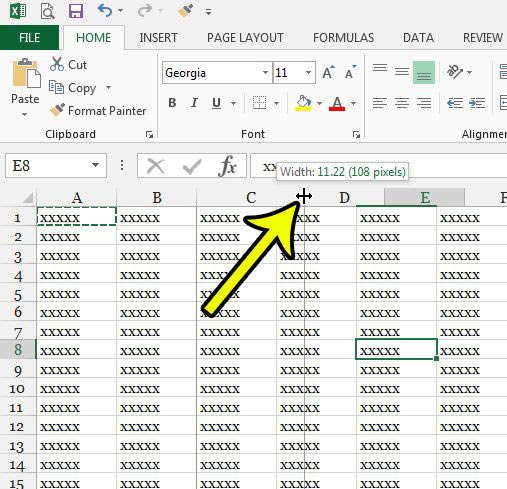
The steps in this guide are going to show you a couple of ways that you can elongate a cell in your Excel spreadsheet. You will be able to do so by either manually dragging the border of the cell to extend its length, or by entering a specific value for the cell’s width. Note that you can only elongate the entire column. It isn’t possible to elongate a single cell. Step 1: Open your spreadsheet in Excel 2013. Step 2: Locate the column letter above the cell that you want to elongate, then click on the right border of that column letter and drag it to the right.
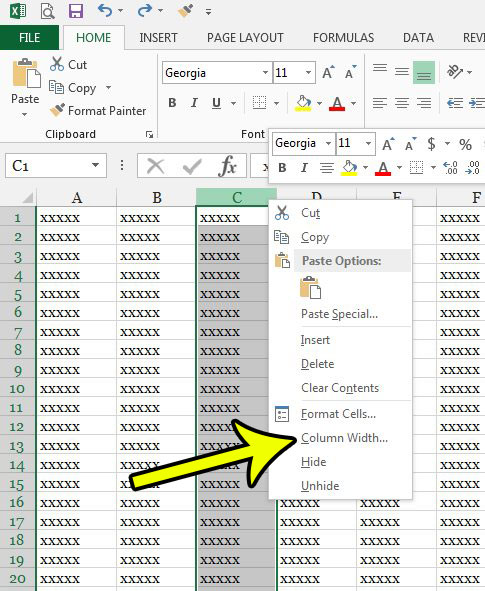
Alternatively you can right-click on the column letter, then select the Column Width option.
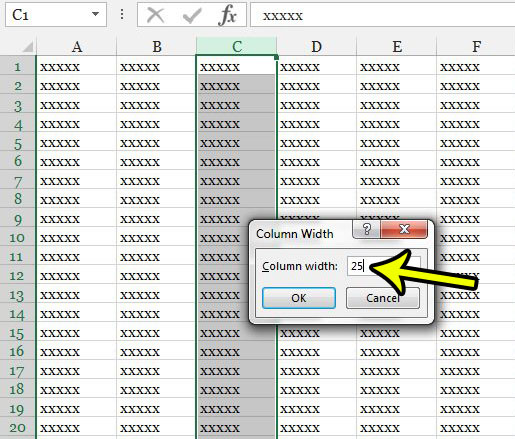
You can then enter a value into that field to elongate the cell.
If you would like to elongate the cell downwards rather than to the right, then the method is essentially them same. You would select the bottom of the row number at the left side of the sheet and drag it down, or you can right-click on the row number, select Row Height, and manually enter a value. Are you having trouble printing one of your spreadsheets? Read this guide and learn about several different ways that you can modify an Excel worksheet so that it prints a little better. He specializes in writing content about iPhones, Android devices, Microsoft Office, and many other popular applications and devices. Read his full bio here.


