I find that most of the spreadsheets I work on start as a huge, single worksheet containing all of the relevant information, but that it needs to be simplified or reorganized for the purposes of the person that will be reading the file. My preferred method for staying organized in these situations is to separate things across worksheets, then I can follow the steps below to delete worksheets that are not important for the result I am trying to achieve.
Delete a Tab in Excel 2013
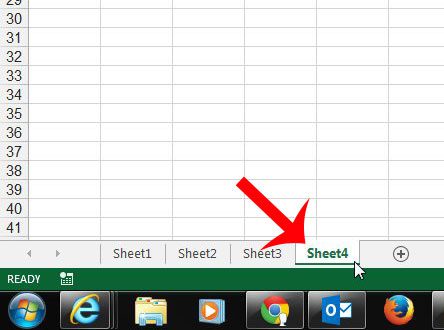
As mentioned above, the tabs at the bottom of the Excel 2013 window signify an individual worksheet. It can be helpful to separate parts of a worksheet into separate sheets for organizational purposes, but less experienced Excel users can easily be confused by the tabs. So if you have tabs that are not relevant to what you are doing, then you can follow our steps below to delete those tabs. Note that this will delete the worksheet that the tab is identifying as well. Step 1: Open your Excel file that contains the worksheet that you want to delete. Step 2: Locate your worksheet tabs at the bottom of the window.
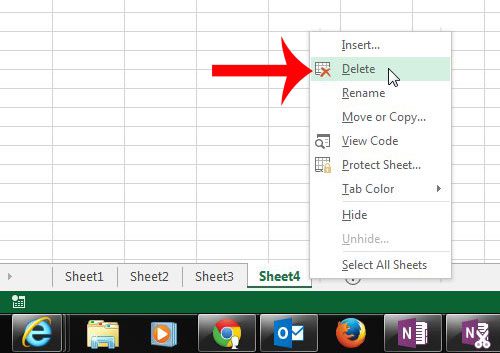
Step 3: Right-click the tab that you want to delete, then click the Delete option.
Would you like to make your worksheet tabs easier to identify? Change the color of a tab with the steps in this article. After receiving his Bachelor’s and Master’s degrees in Computer Science he spent several years working in IT management for small businesses. However, he now works full time writing content online and creating websites. His main writing topics include iPhones, Microsoft Office, Google Apps, Android, and Photoshop, but he has also written about many other tech topics as well. Read his full bio here.
You may opt out at any time. Read our Privacy Policy