In situations like this, you may be looking for an alternate way to scroll through applications. One way to do this is by changing a setting on your Mac so that the scroll bars are always visible in your applications. Our tutorial below will show you where to find and enable this option on your computer.
How to Display Scroll Bars All the Time on a Mac
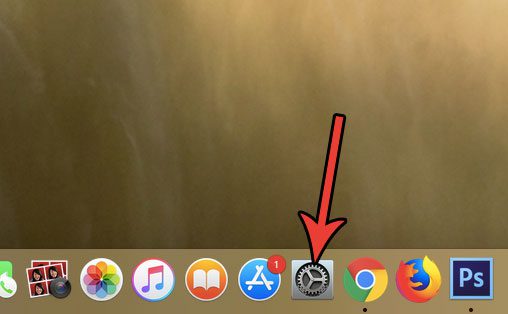
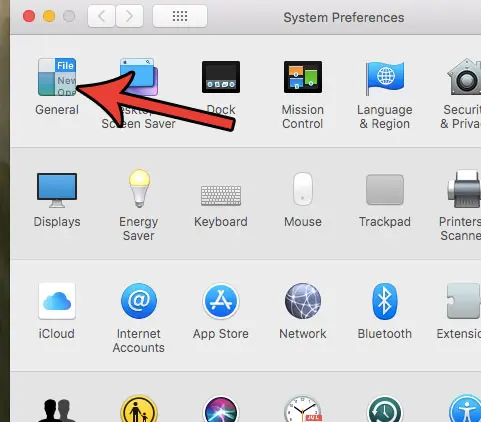
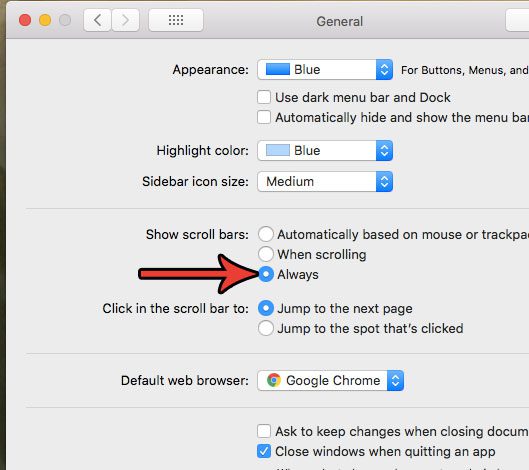
The steps in this article were performed on a MacBook Air in macOS High Sierra. By completing the steps in this guide you will be changing a setting on your Mac so that the scroll bars are always available in applications where that setting is taken from your Mac’s system preferences. If you find later that you don’t like always having the scroll bars visible you can come back to this menu and select one of the other options. Tip: Deleting junk files can help you free up storage space on your MacBook if it’s nearly full. Step 1: Open System Preferences. Step 2: Choose the General option. Step 3: Select the Always option to the right of Show scroll bars. Note that this doesn’t display the scroll bar at all times for some of the programs that you have installed on your Mac, namely the third-party apps. For example, enabling this option doesn’t make the scroll bars visible all the time in Chrome. The time that is shown in the status bar on your Mac can be customized. Find out how to show or hide the day of the week to the left of the time, for example, if that is information that you would like to have or remove from the status bar, After receiving his Bachelor’s and Master’s degrees in Computer Science he spent several years working in IT management for small businesses. However, he now works full time writing content online and creating websites. His main writing topics include iPhones, Microsoft Office, Google Apps, Android, and Photoshop, but he has also written about many other tech topics as well. Read his full bio here.
You may opt out at any time. Read our Privacy Policy


