Our guide below will show you how to add a background picture to your document via the custom watermark tool. We will also show you a couple of different formatting options that you can use which will help you to achieve the desired effect from your background image.
How to Set a Picture in the Background of a Word 2013 Document
This article is going to show you how to take a picture that you have on your computer and insert it into the background of your document in Word 2013. You will have the ability to scale the document to your own specifications, and you can apply a “washout” effect to the picture so that you can still read the content of the document. Step 1: Open your document in Word 2013. Step 2: Click the Design tab at the top of the window.
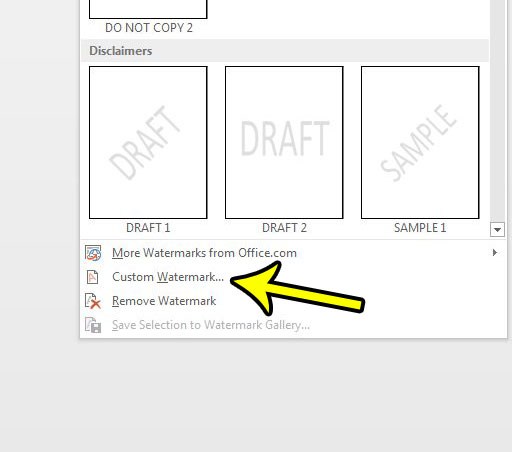
Step 3: Click the Watermark button in the Page Background section at the right side of the ribbon.
Step 4: Click the Custom Watermark button at the bottom of this menu.
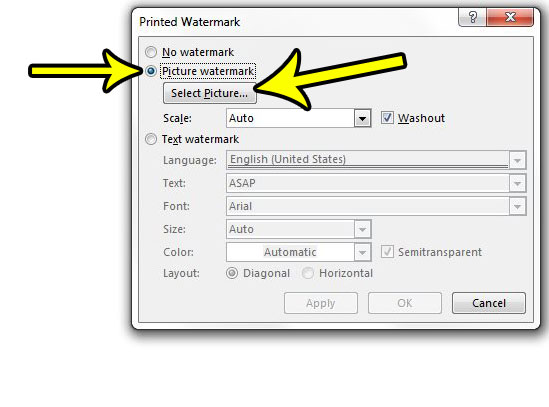
Step 5: Select the Picture watermark option, then click the Select Picture button.
Step 6: Use one of the options on this screen to locate the picture that you want to set as your Word 2013 document background picture.
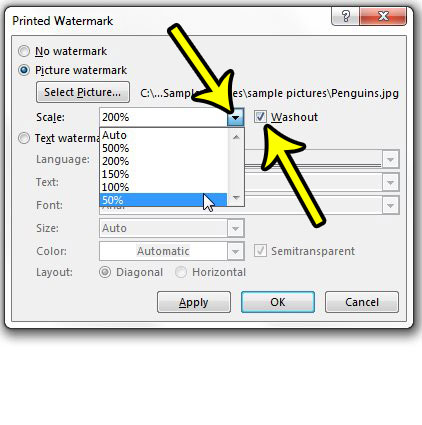
Step 7: Click the Scale dropdown menu and choose one of the options listed there. Note that you can also elect to enter your own scaling by clicking inside the field and entering a number, followed by a % symbol. Check the Washout box if you would like the image to appear washed out. Once you are done, click the OK button.
Does your Word 2013 document have specific spacing requirements that you are having trouble meeting? Learn how to single space in a Word 2013 document and see all of the different places where you can specify line spacing. He specializes in writing content about iPhones, Android devices, Microsoft Office, and many other popular applications and devices. Read his full bio here.
